Welcome!

Welcome to my New Blog. This blog is for sharing my crafting ideas and my cutting files that I create primarily using the Make the Cut Software and my electronic cutters which include my 18" Black Cat Cougar, a Silhouette SD, and an original Expression.

All files and information shared here is for your personal use only. Please contact me if you wish to use any items commercially, for blog contests, or to submit for magazine publication. Thank you.
Showing posts with label card. Show all posts

Wednesday, March 6, 2013

Magic Slider Card


This is a "Magic Slider Card" that I made last year. I originally found a written tutorial and directions on making this card and used that to create a  Make the Cut (MTC) cutting file for it. I then used it with my crafting group for us to make cards.  I gave this one to my Mom for Mother's day last year so I am pretty sure I made the cutting file back in May of 2012.
 
I had meant to put it up on my blog back then but I guess I never got around to it.  I remembered it when someone was looking for a "slider card" last week on the Make the Cut Forum.  This was not the exact type of card they were looking for, they were looking for a slider card that had multiple layers that slide out of the top. However, I still wanted to go ahead and share this file here since I hadn't done so previously.  Figured it had been sitting on my computer long enough!
 
For complete directions on assembling this card, you can see Beate John's written tutorial that I used to create the card  which can be found here at the splitcoaststamper's website: http://www.splitcoaststampers.com/resources/tutorials/magic_card/ 

There is also a Youtube video for those who are visual learners!  You can find it through the above link to her written tutorial.

The cutting file is for personal use only. It should NOT be sold. Cards made with it may be given away or sold.

Download the MTC "Magic Slider Card" file.  Be sure to read the notes section in the file. The file contains two base cards.  One has the rectangular window as shown in this card and one has an oval window.  Placement of your image on your pull out cards are extremely important as my crafting group will attest to!  We used recycled acetate for the "window".

Given the complexity of this file, I have not converted it to an SVG file at this time.  If you are interested in an SVG file for it, leave me a comment and if I get enough requests to convert it I may try when I find time.  Thanks for your understanding.  As always, thanks for stopping by!  I would love to see what you make if you use this file!

Sunday, October 14, 2012

Happy Halloween - Witchy Footwear Card

Another Halloween post from my old blog first shared back in 2009.  (Wow, can't believe it has been three years!)

I had purchased the Sept/Oct 2009 copy of PaperCrafting Magazine. It has several cute card ideas in it. One is a "Witchy Footwear Card" designed by Kim Hughes.

I liked the card but of course wanted to be able to cut out multiple of the cards with my die cutting machine. So, with the help of my scanner and computer, I downloaded the pattern for the Witches Boot, and created an .svg file with Inkscape (MTC was not yet out then. Today I would scan directly into MTC.) Since the "card" requires a "front and back" and the pattern only had 1boot, I had to copy it and then flip it and then weld it to get my "card".

If you have a 4shared account, you can download the single Witches Shoe .svg file here. You can download the Witches Shoe CARD .svg file here.

I have also reloaded the files to my Public Dropbox account for those of you without a 4shared account.  They can be downloaded here: single Witches Shoe .svg file or the Witches Shoe Card .svg file.

As always, thanks for stopping by.  Please let me see what you create with any of my files!

Sunday, October 7, 2012

Flap Card

Please Note: This is an old post from my old blog.  I have several "Halloween" items that I had previously shared on that blog that I wanted to "repost" here on my newer blog. Technically though, this idea could be used for any time of the year you needed a "gift card holder." I just happened to have made them into "Halloween" ones.  They could also be used to put a small package of "flat" Halloween candy into.  (Think M&Ms, skittles, etc.)

 I was browsing around on Splitcoaststampers.com and ran across this cute "Flap Card" created by Rose Ann Reynolds.  This is a simple tri-fold card that makes a small card or can serve as a cute gift card holder. You can find the Tutorial with the directions and pattern on the splitcoaststampers site here.

You can also go check out  Rose Ann's blog, "Paper Delightz," with other cute ideas and projects created by her.

I made my "flap cards" into Halloween cards.  I have made them into gift card holders and plan to put $5 McDonald Gift Cards in them for my children and my nieces and nephews. To use as a gift card holder you can either use a kraft knife to cut "slits" into a couple of corners of the mat inside to hold the gift card (use the card to position where the slits need to be placed), or simply put some repositionable glue on the back of the gift card, or make a pocket out of the inside mat (you may need to cut that down a little to create the pocket and still be able to see the gift card).  The finished size of the card is 4.25" tall by 3.5" wide.  Just the right size for a gift card holder.

If you have a 4shared account you can Download the .Flap Card mtc file for Make The Cut here.  Download the Flap Card .svg file here.  (These were the original files shared via 4shared. At that time 4shared did not require you to have an account.) If you don't have a 4shared account I have now loaded these into my public folder in my dropbox account to share. Download the Flap Card .mtc for Make the Cut here. Download the Flap Card .svg file here.

 Note that my .mtc file has information and notes available under the Notes Bar.  Sadly, I cannot add "notes" to the .svg file.  So I will note here that I have added two "flaps" for the "flap" should you wish to add mats and decorative paper to the front flap of the card.  It then has 1 smaller mat overlaying decorative paper to the larger mats that are there to cut and use on the outside and inside of the card as used on Rose Ann's sample pics in her Tutorial.  Thanks for stopping by.  Would love to see what you do with my files!

Wednesday, July 25, 2012

Happy Birthday Book or Card from Royal Inspirations SVG

Hello again!  Two posts in two days!  A new record for me!  LOL  Well, at least for the past little while.  I'm going to try and get better, I promise.  I do have some things to share with you, just no time to sit down it seems to get it all written up, photos taken, and posted! Summer time seems to make it even more difficult.  We'll see if I can improve once school starts back next month!

Yesterday I shared with you a new site, Royal Inspirations SVG started by my friend Retta. On her site she has lots of wonderful files that you can obtain in 3 formats so she should have almost all of you covered.  Not only does she provide the files in SVG format, but she also provides them in Make the Cut (MTC) and SCAL formats as well so that should mean that she probably has a format that works easily for you!  She has files in a variety of categories and price ranges and even has free files for you to download and try so be sure to stop by and find some that will inspire you!

When I saw this Birthday "Book or Card" that Retta designed I just knew that I had to have it!  I wasn't sure when I was going to actually use it, or who the lucky recipient was going to be but I knew I had to get it and create it!  It's wonderful!  The one thing I learned however is that with something like this, you want to make sure that you have a really good sticky mat to ensure those beautiful letters stay put on the mat while you are cutting them!  I have a bad habit of trying to reuse mats over and over and over again even when I should stop and fix them!  I thought I could squeeze a few more cuts out on this one with a little help from my painter's tape but no go.  However, once I broke out a new mat, it was easy breazy and I was wondering why I had wasted my time and paper to start with!

Instead of using chipboard for my "book" backing, I choose to use some neon green styrene that KarenP had first shared about finding on the MTC forum.  It matched great with my green letters and added just enough backing to my pages.  It gives the book that little extra "pop"!  Best of all, it and Retta's files cut great on my Black Cat Cougar that I have been neglecting! 

Speaking of my Cougar, I Love my Cougar, but that doesn't mean that I'm not green with envy about those who are getting the newest cutter, The Silver Bullet,  from Sherri at That's Scrap, Inc. in the USA, Dawn at Thyme Graphics in the UK  and Jo at Cutting Edge Craft in Austrailia too! They look wonderful and I am hearing great things about how well they are cutting too!  Wish I could justify getting one too (I do love new gadgets and toys) but I will stick with my Cougar for now as it does everything I need and more.  I just need to use it more (then maybe I can justify a Silver Bullet too! : ) )  However, if YOU are in the market for a new cutter that will work with MTC and SCAL be sure to swing by and check out the Silver Bullet!  They may just have one with your name on it! But even better than the cutters themselves, is the customer service and support that each of these 3 ladies give, before, during and after the sale! To help justify that new purchase, be sure to check out all of Retta's designs at Royal Inspirations SVG and see what she has waiting for you to create.

As always, thanks for stopping by!  I will be sharing more creations made from some of Retta's files with you as I have other things from her shop that I thought were just too cute!  Plus, I have some of my own files to share with you soon too as soon as I can find more time!  That's the great thing about working with someone else's files, it takes a whole lot less time to actually "create" the end project!  See you soon (I hope!!)

Tuesday, July 24, 2012

Frog Card created with file from Royal Inspirations SVG site


Hello everyone.  Thanks for stopping by.  No files of my own to share today but I wanted to show you this card that I made with a file from my friend Retta's new site, Royal Inspirations SVG. I have obtained several of her new files recently and wanted to share a few of them with you here.  I have two things made already, this card and something else I will share with you tomorrow.  Retta's files are amazing and contain a lot of detail work but yet still cut so easily with my Make the Cut software and my Black Cat Cougar. So don't be fooled by the name of her site, she not only has SVG files, but she also provides her files ready to go for Make the Cut (MTC) and Sure Cuts A Lot (SCAL) users.  With those three options, she is sure to have a file type that will work for almost everyone!

This jumping frog is Retta's file.  I added a quick crown and lily pad of my own.  The corners of the mat were punched using a Martha Stewart punch.  I thought it looked like "bubbles" of water!  Notice all the detail to the frog!  Didn't Retta do a great job with all the detail to make him so adorable!  I thought he would make a cute card to send to my niece who recently broke up with her boyfriend.  I decided not to add any wording to the front of the card and simply added it to the inside.  Inside I put, "Look at it this way . . . another frog has been eliminated so you are that much closer to finding your handsome prince!"  I think she will appreciate it!  (She broke up with him so all is good there!) I pop dotted the frog and the crown up for dimension after adding some inking and glitter pen work.  I embossed and inked the lily pad as well.  It was a quick and simple card that I hope will make my niece laugh and it was so simple using Retta's handsome frog!  Be sure to stop by Retta's new shop and see all the other wonderful files she has to offer. You can find her site, Royal Inspirations, SVG here: http://www.mainstreetartsandcrafts.com/rettas/.

As always, thanks for stopping by!  I have another file of Retta's to share with you tomorrow.  It is even more adorable and great for a special birthday!  Then, I have some other things that I have been working on in the past few months but haven't found the time to sit down and share with you yet so be sure and stop back by soon and I will do my best to get those added too!

Friday, June 15, 2012

Dragonfly Stencil Edge Card (MTC & SVG files available)


Here's another "Stencil Edge" card that I made with my Make the Cut software.  They are really fairly simple to do once you understand the overall concept.  Fun and addicting too!  Again, I found the free dragonfly by doing a google search for images and made some tweaks to it before converting it and adding it to a card base.  Made this card in honor of my sister Melissa and my niece Jessica. They know why! I tend to prefer larger cards so mine are usually 5" x 7" but they can easily be resized as desired. If you missed my first 3 stencil cards go back to my post 2 back to see more of these or go to the MTC forums to find more.  Search for "Webinar Homework" on the forum.

The above is a screen capture of my image from MTC but I have test cut he file and checked the download links so everything should work fine. Thanks for stopping by!  Have a great weekend.


Download the Dragonfly Stencil MTC card here.

Download the Dragonfly Stencil SVG card here.


Thursday, June 14, 2012

Manly Card - Vest for Dad - .svg and .mtc files

******Another timely, but old post from my old blog.  A vest card for that last minute Father's Day card you might need to make! (I actually meant to repost this in time for Father's Day cards but forgot about it until now.  Don't forget Father's Day is this Sunday, just 4 days away!!!!**********

Hello. I was looking back through my huge stack of "ideas" and ran across a project that I had been working on a while back.  I decided to finish it up and put it out here to share with the blogging world.  I found the original pattern in a February 2008 edition of Paper Crafts magazine (page 60) entitled Vest Card. You can find the magazine's website at  http://www.papercraftsmag.com/index.html. (Unfortunately, the website no longer goes back to that edition!)  The article notes that the design was courtesy of Tinkering Ink & Mainly Stamps.  I believe Tinkering Ink's website address is: http://www.tinkeringink.com/ (but I didn't find anything there related to this Vest Card.)  I have seen other "vest" cards in the past, but this is where I got my pattern from.

First, I copied and cut out the pattern provided in the magazine.  I then enlarged it and scanned it to make my cutting file(s).

There really aren't any "directions" to provide. Once you cut out the card from a patterned cardstock, you simply fold the card at the middle of the arm holes so that the points of the bottom of the vest line up.  The "flat" side of the vest (as opposed to the pointed side) is the outside overlapping flap.  The .svg file does not have the "pocket" and the "hankie".  I hand created those and imported them directly into MTC from the scanner.  Glue the "hankie" to the backside of the "pocket" and then glue the pocket onto the front left side of the Vest.  You can then create "buttons" or add real buttons to the right front side of the Vest.  I created buttons with a small hole punch and glued them onto the card front. Then used a marker to make button holes.

Note these original downloads are from my 4shared account.  4shared now requires a free membership to download from their site.  So feel free to download from there if you have an account. If no 4shared account then see download option below.

4Shared Account Users - You can download the Vest Card .svg file here. You can download the Vest Card .mtc file here.  The MTC file is sized correctly and has the pocket and the hankie cuts as well. As always, let me know if you have any problems with any of my files and I would love to see what you create with any of them!  Thanks for stopping by. (Note these original downloads are from my 4shared account.  4shared now requires a free membership to download from their site.  So feel free to download from there if you have an account.)

No 4shared Account? If you do not have a 4shared account and don't wish to create one, I have reloaded these files to my public dropbox account and you can download them from there here. Note: You may need to do a right click and save, save as, save target as in order to save the files to your computer depending upon what browser you are using.  I have tested the files and the links and all appear to be working correctly.

Download the Vest Card .svg file here or download the Vest Card .mtc file here.

As always, thanks for stopping by.  I hope to have some other new files and pics posted for some neat projects in the next few days so be sure to stop back by!  Don't forget to show me what you create!

Wednesday, June 13, 2012

Stencil Edge Cards - both MTC and SVG files available

Hello. Just wanted to share some new cards that I made in the past few days.  They are "stencil edge" cards or in one case, just a stencil card.  Several of this style card had been shared on the MTC forum in the past few weeks and some people wanted to have it shown in a MTC Webinar how you would make them.  So Bryan showed several ways to do them in a MTC Webinar on 6/5/12.  I gather he did a followup on them again last night on the 6/12/12 Webinar (haven't seen that yet.  Will review when he gets it posted). During the 6/5/12 Webinar, Bryan had assigned homework for people to create their own versions of these cards and to then share pictures of them on the MTC forum. Pictures of many of the ones people have created have been shared in this thread on the MTC forum: http://forum.make-the-cut.com/discussion/25151/webinar-homework#latest.  (There are a few others scattered about in other threads(search the forum for stencil card) but this gets you to the bulk of them).

Julie from MTC_Tuts Yaho group also wrote a tutorial on using MTC to create a card like this.  You can find more information about the tutorial and where to find it by checking this thread on the MTC forum: http://forum.make-the-cut.com/discussion/25163/make-a-card-withastencil-edge-design-tutorial#latest

As a result, I decided to give a hand at trying them myself.  Some of the ideas I had considered making others had already done and I didn't want to recreate a similar card. So I looked for images that I had not yet seen done.   I choose an ice cream cone and a lighthouse.  While I was looking for free stencils that would work for this style of card, I ran across a sailboat that I really liked but didn't think was suited for putting on the edge of the card.  As a result, I chose to simply put it on the front of the card.  The pictures show the sample cards that I cut out to test my files.  The ice cream cone also contains a "print and cut" colored ice cream cone that I used behind my "stenciled" emage to add a pop of color to it.  This can also be "split" and the pieces used to create a paper piecing of an ice cream cone.  All cards have an insert to cut for the inside.  I think they would look great using vellum too.  Finally, the sailboat card also has a "stitching line" that I used to create  a stitched look with a marker on one of my cutters.  I think I will use the ice cream cone card either as a birthday or a simple "hello" card.  The lighthouse and sailboat may get used for father's day cards for my DH and my FIL.  Sadly my father is passed away so I cannot share one of my cards with him! If I don't use them for Father's day they could be used for several other things as well don't you think!

I created my original files in MTC but have exported them out into SVG for use by others with different software. I hope that you like them and would like to see what you do with the file(s).

The files are loaded into my public folder in my dropbox account.  You may find it necessary to do a right click and "save as" or "save target as" to save to your computer.

Download the Ice Cream Cone Stencil Edge Card MTC file here.

Download the Ice Cream Cone Stencil Edge Card SVG file here.

Download the Lighthouse Stencil Edge Card MTC file here.

Download the Lighthouse Stencil Edge Card SVG file here.

Download the Sailboat Stencil Card MTC file here.

Download the Sailboat Stencil Card SVG file here.

As always, Thanks for stopping by.  Please let me know if you use one of my files to create something.  I would love to see a picture or too!  I also have a few more things that I have been working on recently that I hope to find time to take photos of and to share soon here on my blog.  Some of them will have files to share as well so be sure to pop back in soon!

EDITED TO ADD:  You can see a birthday card made for SusanBluerobot with my Lighthouse card on Tracy's blog here: http://traceyfarr.blogspot.com/2012/06/another-stencil-card-for-susan.html?showComment=1343081980251#c6827046814225669317!  Thanks for coming and sharing your link with me Tracey so I could see your card you made for Susan!

Thursday, May 10, 2012

MTC & now SVG files for Swinging Z-Fold Card


******* UPDATED with SVG FILES - See Below - 2 files for each card size needed! ********

Good morning.  I have been doing a little crafting and creating some cut files for use with MTC recently.  However, I haven't had time to do the "behind the scenes" work that needed to be done so that I could share some of those files and information here with everyone.  DD's travel VB and DS's baseball is done for now (though we are now into Spring Football practices!) so that will free up some time (for a little while). DD has had her meniscus surgery done and that went well. She is on the mend and hopefully it will be a short recovery rather than a long one.  However, it also means that I am back to driving and picking them up everyday for school while she is still on crutches!

Anyway, some of my limited crafting time was used to create 2 different MTC files for the Swinging Z-fold card.  I found the information and tutorial for this card on the Splitcoast Stamper's website here: http://www.splitcoaststampers.com/resources/tutorials/swingzfoldcard. There is also a link from there to the Gallery where people have posted cards that they have made using the tutorial.

It was created by Beate John's and shared there. I have simply created MTC cutting files for it to make it quicker and easier to make one of these cards!  Thank you to Beate's for the tutorial that I found.  You can find it also on Beate's Blog: http://beate.blogs.splitcoaststampers.com/2010/12/16/tutorial-on-scs-swinging-z-fold-card/.  She also has a link there to her YouTube video she compiled on how to make the card for those of you who are more visual learners!

You can also do a Google search for "Swinging Z-Fold Card" and find pictures of other cards people have made for examples. I found quite a few really cute ones (one of which is why I decided to create this file so I could make some!)

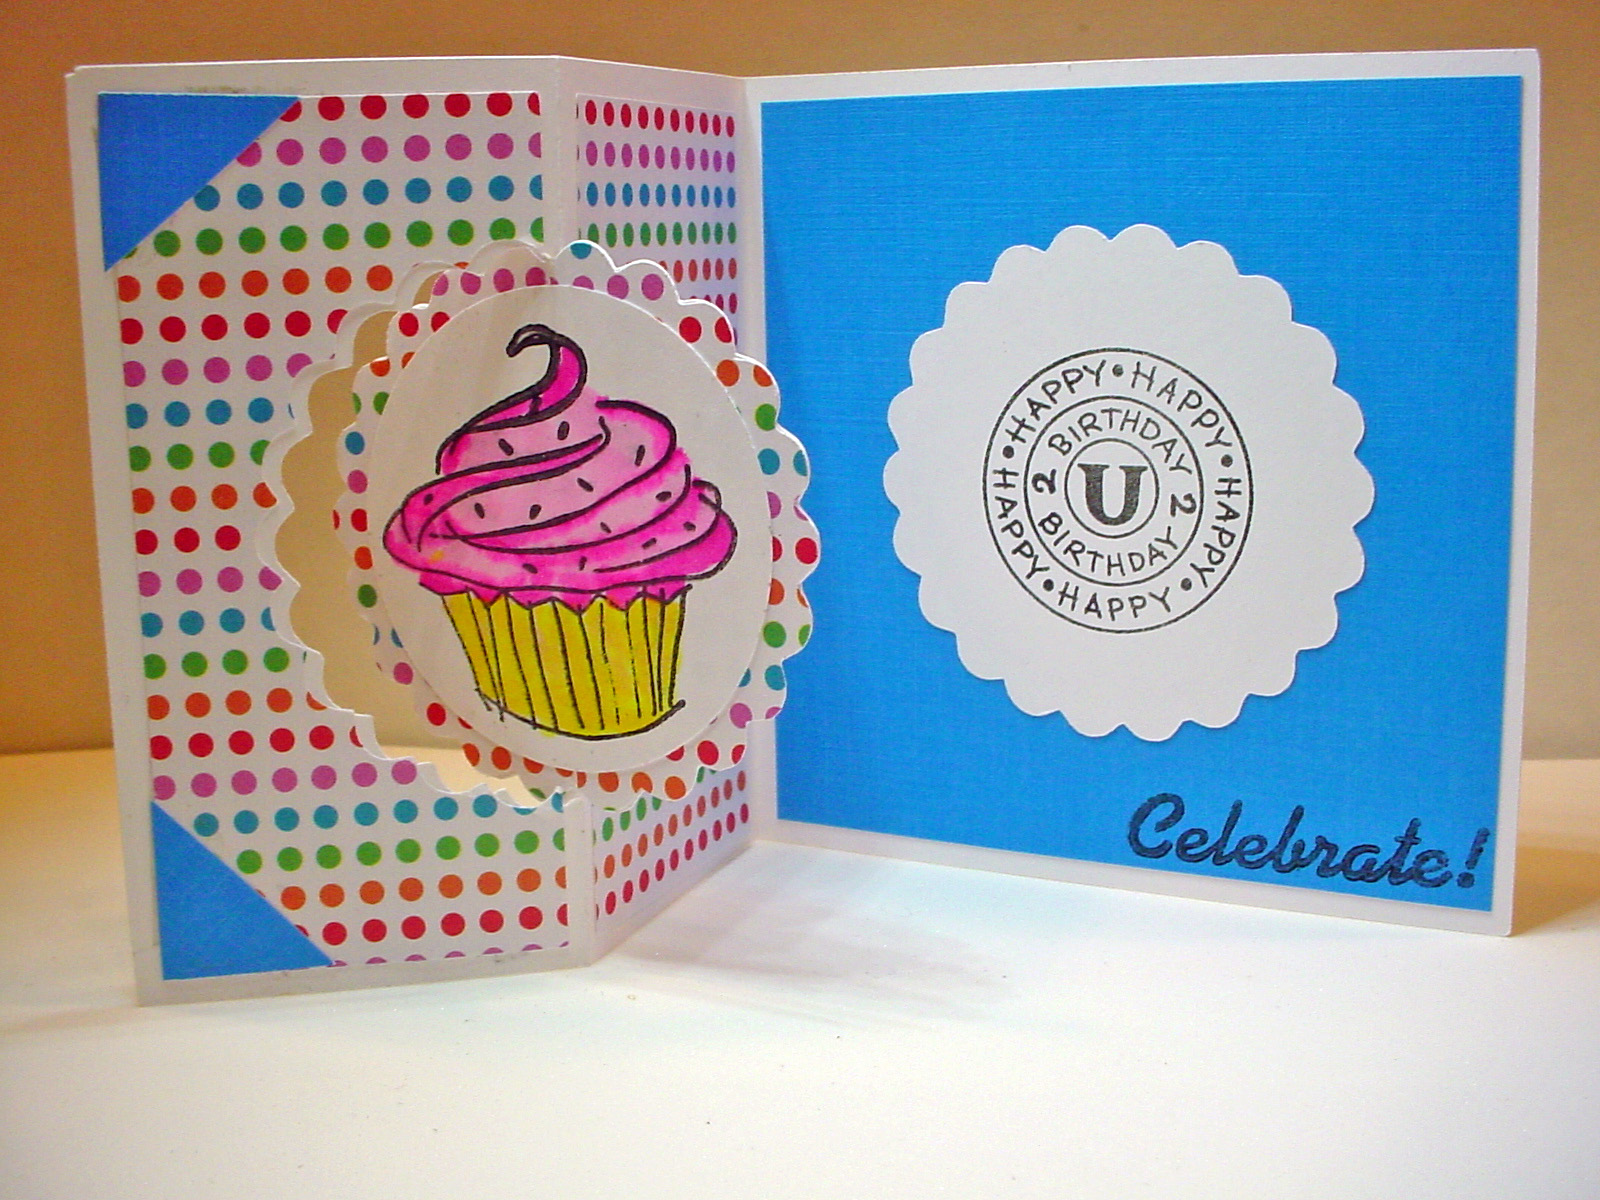
These are the two cards I made quickly to test my cutting files.  Neither of my files include the bear or the cupcake images that I used as they are stamps that I have.  I haven't "finished" the larger card with the bear and his ice cream cone.  Saving it to decide if it is a birthday card, a get well card, or some other type card.  Once I have a specific use for it, I will finish it off with the needed sentiments!

You can download my MTC Cutting files for the swinging Z-Fold card below.  I have two sizes of files, Beate's original pattern creates a 4 1/4" x 4 1/4" card when folded.  I first created a file based on her directions.  However, I prefer larger card sizes so I then created a second file that will create a 5" x 7" card when folded. I am making both of them available to download here from my Dropbox Account. In the Notes section of my file you will also find a PDF file showing the different "parts and pieces" to this card as well as pictures of these quick sample cards I made just to make sure that the cutting file was working properly.

NOTE: When trying to download these files, if you are unable to left click and save the files to your computer you may need to do a right click and a "save as" in order to download and save. They are saved and downloaded from my DropBox Account.

Download the MTC file for the original 4 1/2" x 4 1/2" Small Swinging Z-Fold Card here. This file has a scalloped circle.

Download the MTC file for the larger 5" x 7 1/2" Large Swinging Z-Fold Card here. This file has a plain circle.

****************** EDITED TO ADD THE SVG FILES *************************
NOTE:  Each size (Large/Small has 2 Files that need to be downloaded for the SVG Files! 
(sorry for the delay in sharing the SVG files!)
***************************************************************************

Download the Large Swinging Z-Fold File 1 of 2 here.
Download the Large Swinging Z-Fold File 2 of 2 here.

Download the Small Swinging Z-Fold File 1 of 2 here.
Download the Small Swinging Z-Fold File 2 of 2 here.


It would be fairly simple to take either of these cards and replace the scalloped or plain circle with another shape if desired (using the Node Editing Tools in MTC.) Feel free to experiment and come back and show us what you have made!

As always, thanks for stopping by.  I would love to see what you create with either of these files!

Thursday, April 12, 2012

Sliding Pop-Up Card MTC File to Share

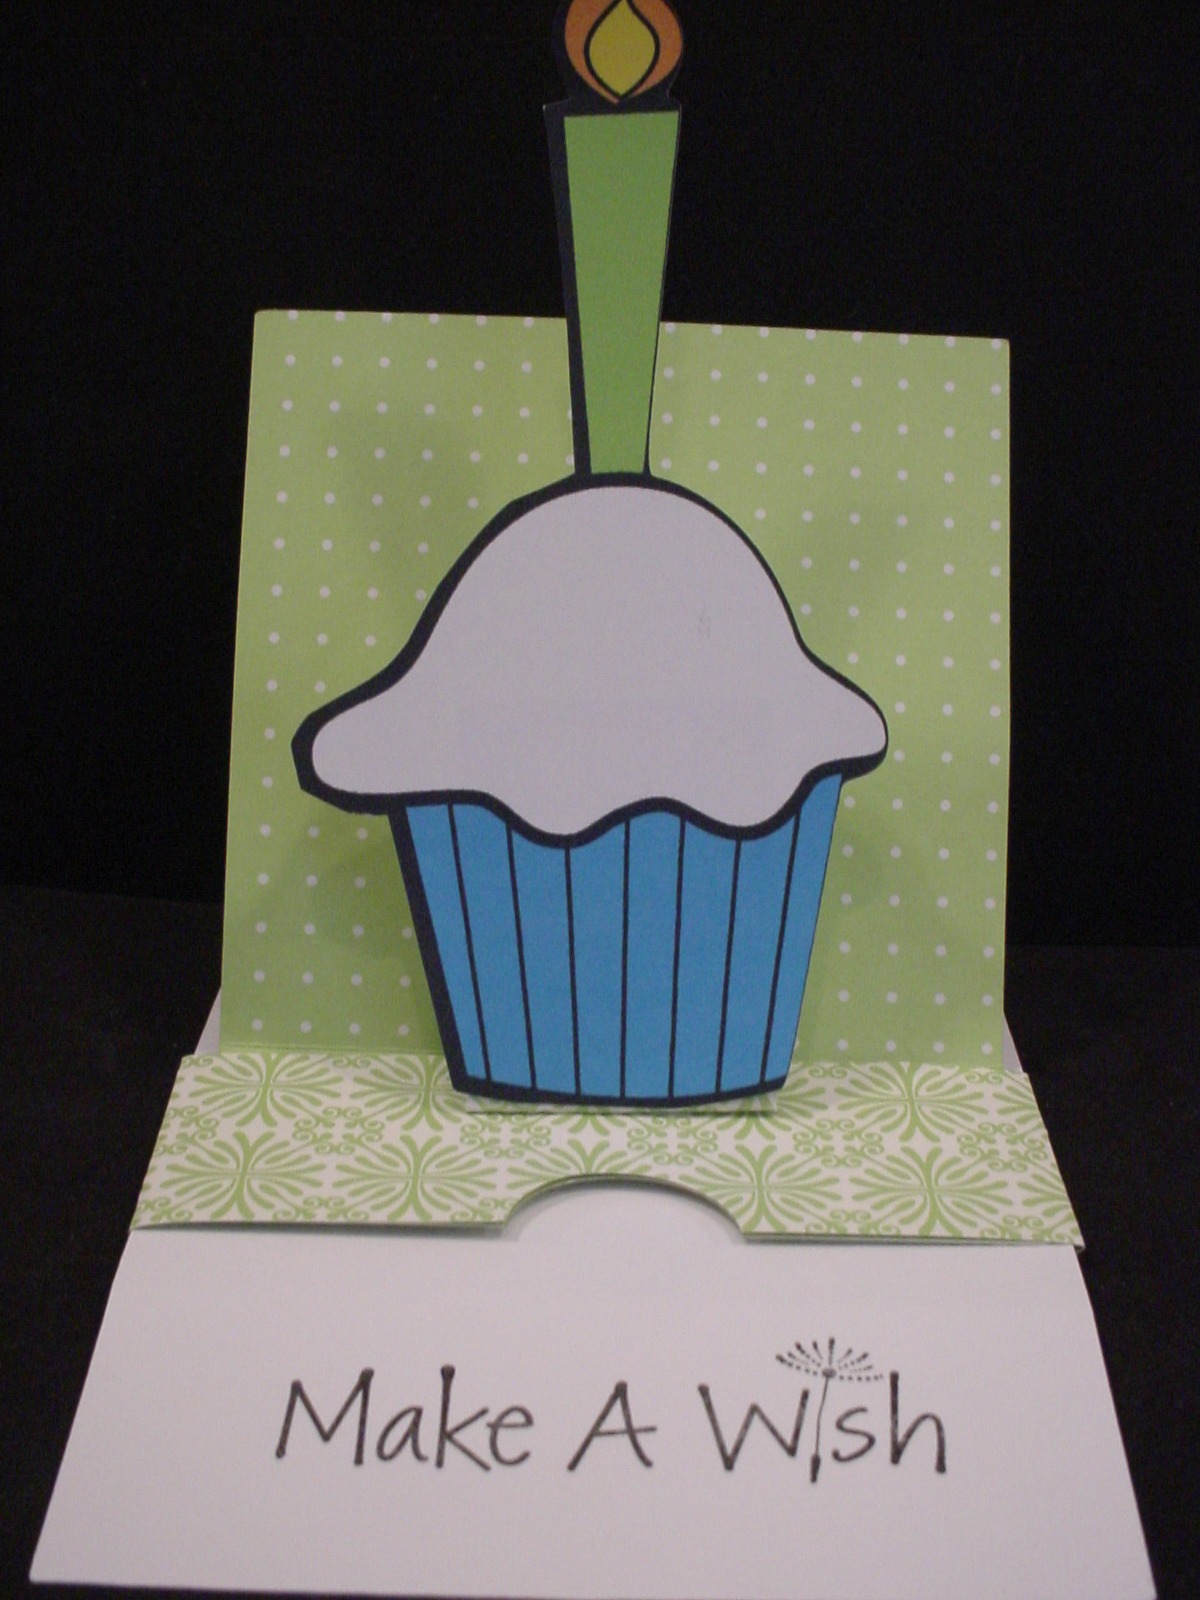
This is picture of card closed as first seen.
Hey everybody.  I wanted to share this Make the Cut file I created based on a Sliding Pop-up Card Tutorial written and shared by Kim Score on the Splitcoaststampers website.   There is also a video tutorial shared there as well for those who want a "visual".  You can also check out the Splitcoast Gallery of cards created based on this tutorial as well. Kim used a Raggedy Andy style image to popup on her's, he is so cute, I think that is what first drew my attention (looks like might have been a valentine card). (I Love the Mickey one in the Gallery that was created by midnightsmum as well!) You can also find Kim's personal blog at Paper Punch Addiction. I need to go check out her site and see more of her work!

They are fairly simple "pieces" to cut and score manually so some might wonder why I would create a "cut file" for something like this.  Well first, I am manual paper cutter and ruler challenged!  LOL  I cannot seem to get a "straight line" for the life of me.  Plus, I hate having to have to "measure" all the time.  By creating this cut file, I don't have to worry about cutting the edge straight or measuring off for the score lines each time I want to create this card.  I just lay my paper on the mat, press a few buttons, and I'm ready to start assembling!  There are several "notes" in the cutting file so be sure to read those, especially regarding how to use score lines in the file if you are unfamiliar with that.

This is picture of card opened and showing message.
My sample card was created using double sided paper and a "print and cut" cupcake image I had previousl found for free online and cut with the Silhouette SD (it was in my cut but not used yet pile!).  Kim does recommend using a heavy cardstock when making htis card.  I didn't have a really heavy cardstock so used what I had.  It worked okay but I can see where a heavier cardstock would probably be better.

 Make sure that you read Kim's directions throughly before starting to assemble. I would also recommend creating a "mock-up" first from some inexpensive paper before using any good paper that you only have 1 sheet of! Watching the video would probably be a good idea too! It's not really that complicated once you get it all figured out. Good luck and let us see what you create with the file!  Please note, the file does not include the cupcake with the candle.

As always, thanks for stopping by!  DD's Travel VB will be ending soon and I hope to be able to maybe start to create and share some more files here on my blog sooner rather than later!

If you have a 4shared account you can download the MTC cutting file here Sliding Pop-Up Card. If you don't have a 4shared account, you can signup to get one for free and then download the file.  This appears to be a change in their Terms of Use, you didn't need to have your own account in the past in order to download my files. I am exploring other options for sharing my files since I don't want people to have to have a 4shared account just to get my files. However, since I don't charge for my files and I don't have ads or anything on my blog to make $$ I need to find a simple and free option to do so.  Stay tuned and I will update as soon as I figure something out! I have only shared a MTC file here since that is how I created my file and it is really fairly simple file to recreate from Kim's directions if you prefer another format.

UPDATE:  I have also shared the file in a dropbox account.  You can find the Sliding Pop-Up Card there as well. It should download directly to your computer.

Thursday, March 22, 2012

When looking for the football outline for the T-shirt to share, I ran across this football shaped card that I had also made last Fall but had never shared the cut file for.  I originally made the card to give to my son to celebrate scoring his first Varsity Touchdown!  He is just a freshman so that was a really big deal!  PLUS, it was even bigger because neither myself nor my husband was there to see it!  : (  In our defense, our school has to travel alot for our games and both DD and DS had games that night (she plays Volleyball).  He was 2-3 hours away and she was at home.  As a Freshman, he indicated that he probably would not get into that game so no need for one of us to come!  Alas, not true!!  We were winning by a good margin already and they put him in towards the end of the game and he scored!  I was so happy and yet so sad!  I did get to see it on the "Web" as we broadcast our games that way!  Anyway, I knew I needed to make him a card to celebrate and let him know we were sorry we missed it and we proud of his hard work and effort that gave him the opportunity to play.

There are several layers to the card.  There is a black base and then there are two white layers in the file.  I think I just went with the one with the 3 pieces cut rather than the solid white base.  I used the swiss dots embossing folder to add the texture and then used some ink to "rough" it up and make it look like a well used football.

You can download the  .mtc (Make the Cut) Football Shaped Card here.

Tuesday, March 20, 2012

Crab, Palm Trees, Waves, and Umbrella for the Beach

Hey everybody.  Been extremely busy and hadn't gotten back recently to share any files that I have created but not shared (no time to create right now it seems either!). I happened to run across this file while "cleaning up" and remembered that I had never shared the file.  Looks like I made it a while ago!  It was from a free pattern I had found. It contains two palm trees with coconuts, the crab and the umbrella.  The sun is simply a small circle and the sand is torn kraft paper that I used the swiss dots embossing folder on and inked the edges and the "dots" to give it texture.  I used a "texture" ink pen on the wave tips.

You can download the Make the Cut file from my 4shared account here. (I use 4shared as it is free and easy to deal with).  Download the Crab, Palm Trees, Umbrella File here.

Saturday, March 10, 2012

Bunny Card With Files to Share

Continuing with another old post from my old blog. I liked the bunny card I posted yesterday so much that I REALLY wanted to share it with people.  SO, I decided to create my own bunny card using basic shapes in my Make The Cut Software.  Although this file was inspired by the previous Bunny Card that I shared yesterday from a pattern in the Spring, 2011 edition of Paper Creations magazine (Issue 28) designed by Maricel Fabi, this one I created from basic shapes in MTC.  Isn't it amazing what you can do by welding a few circles, ovals, triangles, etc. together!  If you look closely, you can see that difference in my bunny's ears, the paws, the nose, the vest, and his overall basic shape.

So, if you thought, "shoot, I would have really liked to have had that pattern" yesterday - now you can have one almost like it but one that I feel comfortable sharing here.  I have included in the Make The Cut file both a welded shape for the card joined and folded at the ears as well as a single bunny shape for use on other projects. There are two files for svg users.  One is for the card its self and the "accessory" parts.  There is a second one for the single bunny shape with paws and feet only. Thanks to Maricel for her inspiration.

I used the "swiss dots" embossing folder to emboss the inner ears on this one.  I didn't add "buttons" to the vest, I created a vest with the "buttons" cut out.(My file contains both vests, one with the circles cut out and one plain.) I pop dotted the nose and the paw holding the flower.  My sample card appears to have his left arm (paw)  "bent" behind him but there is an extra arm to add on that side if desired. This card used 15mm goggle eyes with lashes.  Yesterday's card the eyes were 10mm.  I had previously tried 10mm size with lashes when I made my first one but didn't like it for some reason.  I do think with the larger eyes it works.

Please let me know if you enjoyed my file and let me see what you do with it.  I also think he would be cute made into a "she" bunny (add some lace to the bottom of the vest and make a dress and add a bow to an ear) or holding an Easter Egg or an Easter Basket.  Just use your imagination!

You can Download my Make the Cut file of the Bunny Card here.

You can Download a SVG file of the Bunny Card here.

You can Download a SVG file of just the single Bunny Shape here.

Thanks for stopping by!

Friday, March 9, 2012

Bunny Card


Continuing on with old posts from my old blog.  I needed to show you this one before I share a file I created to be similar to this one tomorrow! This card is from  the Spring, 2011, Issue 28 of the Paper Creations magazine.  In the magazine, on page 22 there was an article entitled, "Bunny Card" which was designed by Maricel Fabi.  It was this really cute Bunny Card for which they provided a pattern pullout to trace and cut by hand. Now, anybody who knows me knows that I HATE to cut with scissors.  (I think this is because I am left handed and, when I was little, all scissors were made for right handed people.  It wasn't until "modern times" that they made left handed scissors or ones that didn't matter which hand you used!  LOL  You won't understand what a problem this is UNLESS you are left handed OR you are right handed and have tried to cut using left handed scissors!!  LOL)  This is what I got my electronic die cut machine and my Make The Cut software for!!!!


The pattern for the full card was too big to lay out on my regular size all-in-one printer with flatbed scanner so I simply scanned in 1/2 of the card.  I then copied the image, flipped it, moved it to overlap properly, and welded the two pieces together to make my card base.  I then scanned in or created the extra pieces and parts like the vest, the bowtie, and the nose.  Their pattern didn't include the flower and stem so I created those along with extra arms and legs in case I wanted to pop those areas and add extra dimension.


Then I cut out the card using my electronic die cut machine and made a cute Spring Bunny Card to send to someone in my family!!  Now, I can easily create as many of these bunny cards that I want quickly and easily (and it doesn't matter what kind of scissors I have!  LOL) Well, I couldn't stop there.  I thought hmmmmmm. . . . . . I'm not sure I like the card folding in 1/2 at his feet, so I then recreated the file so that he was welded together at the top at his ears.  I think I like that better as it opens the way most people expect a card to open.  But now, within just a few minutes of my time, I have two card bases from which I can choose!  THEN I thought, well, he might be cute on a regular card base so I made him a single image that I can now make any size I want and add to other cards.

This is the "Print and Cut" Bunny
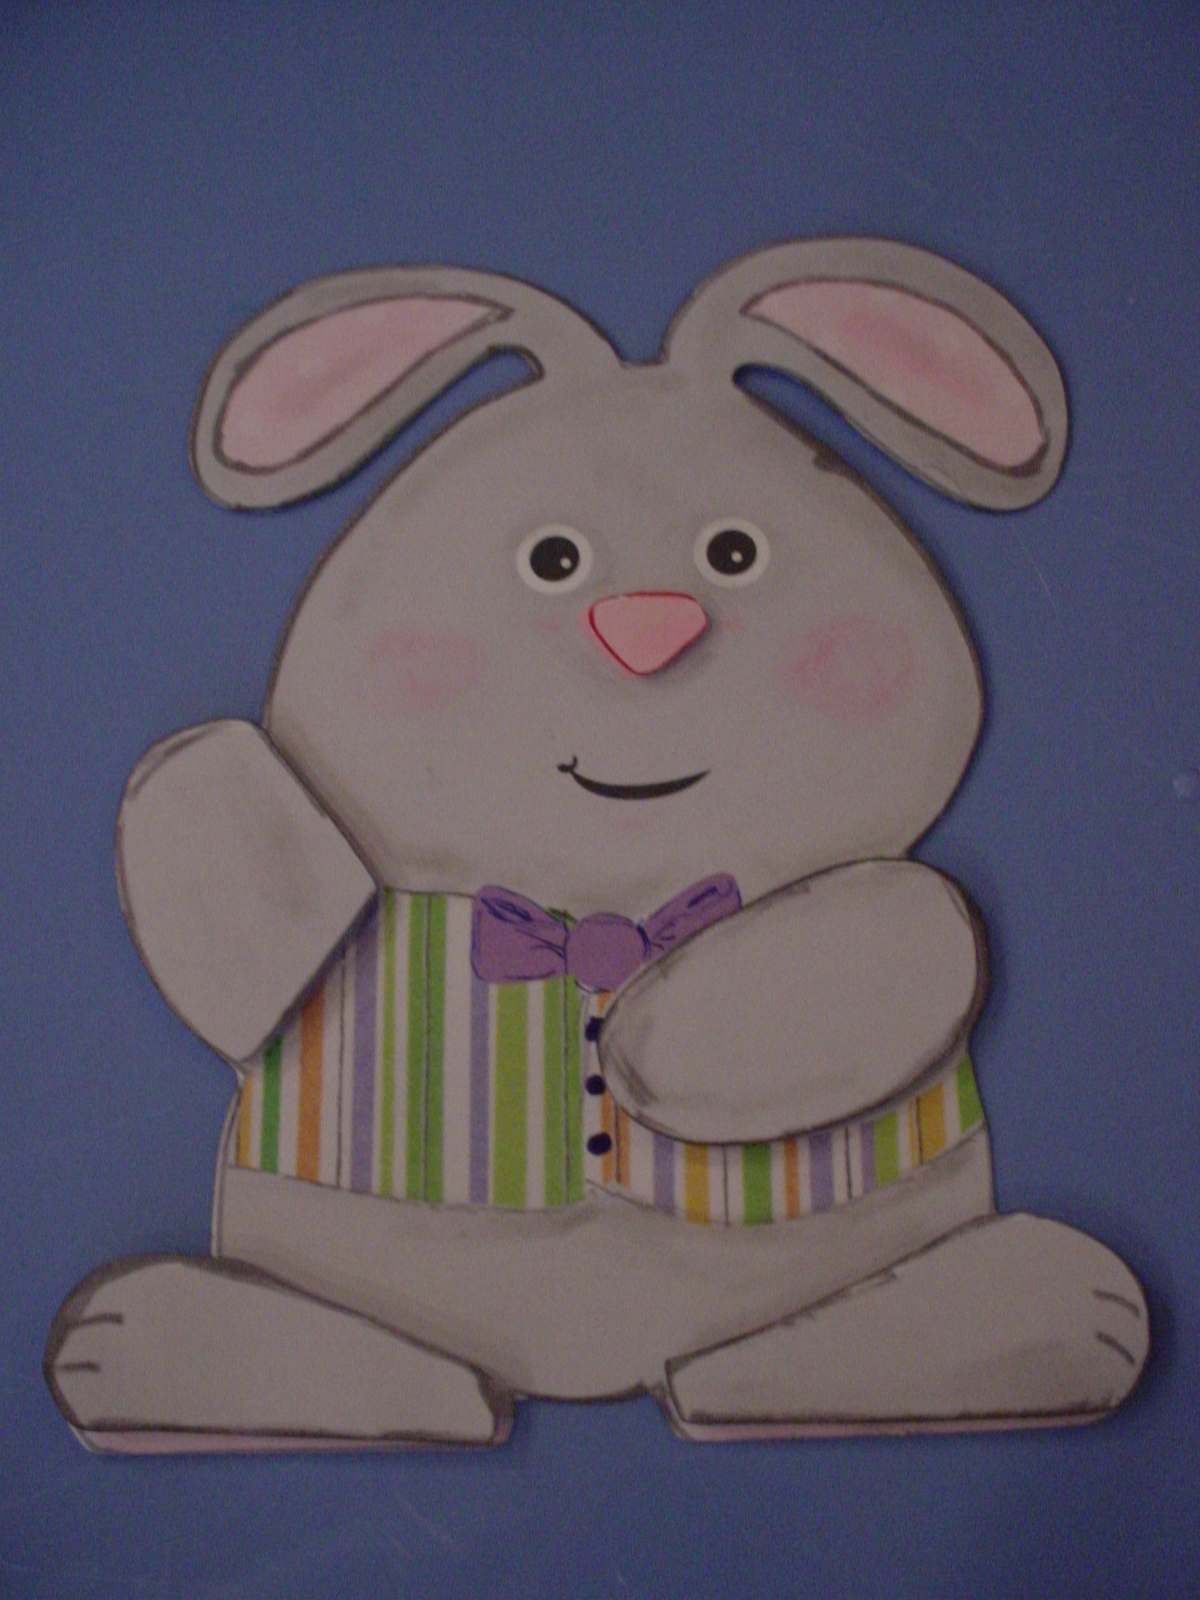
Then I thought - well hmmmmmmm. . . . . . . I think he would be really cute if I made him into a "Print and Cut" file - I bet that I could do that really easy.  So I created a pink polka dot texture that I added to the "inner ear" parts I had created and a multi-colored striped texture that I added to his vest.  I found paper I had in my stash to get these "textures" from and scanned them into my computer and made texture files from them.  I then created a "full bow tie" with basic shapes and added a purple color to it.  I then made his body gray and added his mouth and his eyes to my MTC file so that they would "print".  I then printed the bunny out on my printer (I also added separate feet and hands to "pop" dot to give it some added dimension) and then cut him and the extra pieces with my Cougar (I could also have cut him with my Expression but the Cougar was the one plugged in!).  I then used Marker to ink the edges to give it some more dimension and chalked his cheeks.  Otherwise, its all printed!  IF I had a bigger printer (One that would print 12x12 say) I could have printed him out as a card.  Since I just have a regular 8 1/2 x 11 printer I printed just the single bunny.  HOWEVER, he could be glued on to the top of a card base.  He can also be resized easily.


Since the file I created was from a pattern in a magazine, I can't share it with you here even though I would like to.  HOWEVER,  I wanted to share all of this information with you to show you what YOU can do with a pattern, your die cut machine, your printer  and scanner and Make The Cut software and a little imagination!  Just IMAGINE!!! LOL

As always, thanks for stopping by.  Please let me know if you have any questions on how I did any of this or if I can help you out with anything. You can checkout the magazine's website here: http://www.papercreationsmag.com/. There you can see some of what is in their current issue, back issues and free projects and ideas.  I am not affiliated with the magazine at all but like to give full contact information when I use something from a source.  Thanks.

Tuesday, February 14, 2012

Happy Valentine's Day - Using Print and Cut and Node Editing in MTC

I found this image over at http://freevintagedigistamps.blogspot.com/2012/01/free-vintage-images-wheel-be-valentines.html and decided to use it for a "print and cut" to make a valentine for my DH who loves to ride bicycles. However, I didn't want the image exactly "as is" in the file so I did a little tweaking inside MTC with the node editing tools to get rid of somethings I didn't want (like the flowers and bottom portion) and to "break" the heart away from being "attached" to the bike riders and to fix it so the 's on "Valentine's Day" would cut out as one word "Valentine's". I then created 2 shadow layers of (one bigger than the last one) that heart to add some depth and dimension to pop it up with and then created anothe heart with 2shadow layers to put the "Happy Valentine's Day" wording on. I used the swiss dots embossing folder on the red background paper.

Here's the image as I got it from freevintagedigistamps' blog (I've got it sorta watermarked since I was posting here but follow link above to get the image without the wording across the middle). If you like vintage stuff she has lots of free files and things on her blog. I recommend that you check it out!
:
image

And here's the card I made after pulling it into MTC did some node editing, etc. as explained above and then did a "print and cut". On the inside I added, "always".

image

Thanks for looking. (Can't believe I had DH's valentine's day card done almost a week ahead of time!) 

Wednesday, January 11, 2012


Hello.  Just a a quick post to share a quick card I made with my new laser printer and foil I recently purchased. The foil was purchased from Sherri at That's Scraps, Inc.  In order for this to work, you must use a laser printer (inkjet printers WILL NOT work) - thus the new laser printer! : )  Then to apply the foil, you need a foiling machine (Sherri sells those too) or, if you are lucky like me, you might have a laminator that has a "foil" mode like I did!  I've had the laminator for YEARS and didn't recall the foil mode being on it until I happened to glance at it one day and said HEY it says "foil" on one of the modes!  : )

I had seen the foiling on the Black Cat Forums several people were doing, but had stayed away because I would have had to buy BOTH the laser printer and the foiling machine.  BUT, once I realized that I already had a machine to apply the foil (hopefully) and I only needed a laser printer, that changed the equation just enough! (It also helped that I thought my all in one inkjet was starting on its last legs!)

I found an HP Laserjet 100 color MFP nw for a great price at Office Depot with free shipping that had my name on it! : )  I also purchased one roll of foil from Sherri so I could "test" the foiling with the laminator.  She has several colors to choose from and I wasn't sure what color to get.  I ended up buying bronze color for some reason! Then wasn't sure what to use such a "fancy" color for!

I found this flourish frame and added my first initial to it and then printed it out in black on my LaserJet printer.  Then I cut off enough foil to cover the printed area, laid it on top of my printed piece, placed it inside the laminating protective pouch, and ran it through the laminator on the "foil" mode and "Volia!"  It's that easy!  Now I've got to get online and order some more foil! : )

Foiling is a great idea for lots of things especially if you wanted to make wedding cards, invitations, favors, etc. You can use for most any idea you can think of where you want to add a little glitz to your project.  Your only limitation is it has to fit through your laminator or foiling machine.  Which means, Sherri may still yet see a Foiling Machine order from me yet as my laminator is limited to 8 1/2" wide!

Flowers Anyone? - Flowerpot Pocket or Slider Card


I created these two files and shared them almost a year ago on my old blog. These are my own personal files I created from scratch using the Make the Cut (MTC) software. However, the general IDEA is not mine. I have seen diferent versions of these types of cards in a variety of places before. BUT, what I had not seen was one where the card its self could actually stand up so that it could be displayed to look like what it is, a pot of flowers. So, first I created the base card and then I modified the bottom of the base so that it could be "folded" so that it would "stand" up. I like it. I hope you do too. You can use it for a variety of sentiments, Get Well, Sympathy, Happy Birthday, etc. - anything where you might want to send someone some flowers!!

Both files will fit in a 5x7 envelope if you place your flowers properly!! Use as many flowers as you want. I have 3 on one card and 4 on the other. I added dimension to the circles with the swiss dots cuttlebug folder and inked the raised dots by swiping the ink pad across them gently.

You can put a piece of ribbon and a tag around your "pot" if you want, ink it, or decorate the pot its self- use your imagination.
To create the regular "flat" fowerpot card - fold the base or "pot" in the center of the pot so that it is equal on both sides. Then fold the tops down and score at 1" on each side to create the lip or the rim of the pot. You can adhere the lip or rim of the pot to the pot or not to hold it down more flat (use glue dot, double stick tape, etc).

To create the Standing Flower pot card so that the receiver can stand it up like an actual pot of flowers, create a mountain fold in the center of the base pot so that it is equal on both sides, THEN score at the 1/2 inch on EACH side of the center fold and make these scores valley folds.

PLEASE NOTE: the smaller STANDING file has had more "depth" added to the pot to allow for these extra folds to allow it to stand up. You will not get the correct dimensions if you try this with the larger file.
I hope all of this makes sense. This is one of the reasons I hadn't yet posted the file. I wanted to do detailed directions. I'm not sure these are great, but hopefully everyone will understand them!! LOL If not, leave me a note and I will try to do a better job.

I am only sharing this in the Make the Cut (.mtc) file format as that is how I created my files to begin with. The files have a couple of pages to them. One page has a variety of different "flowers" I created using basic shapes. Then I layered them to create my flowers. Since It's been a couple of weeks since I created the files, I don't recall what all is in them to tell you the truth! LOL

I have had a couple of requests from people who do not have MTC but could use the file if it was in .svg format. I'm sorry, but right now I have not created this as an .svg file. There are a variety of reasons for this. Primarily because it takes times to convert the file and test the cuts and make sure everything works like it should before sharing the file. I NEVER share a file unless I have test cut it myself to make sure that it works as it is intended. As a result, I haven't had time to convert the file to an .svg file. I may try to do that soon however so check back!

I would love to see any that you make and hear what you did with them. Thanks for stopping by.

If you have a 4shared account you can Download the Larger Flat Flowerpot Card here and/or Download the Smaller but Standing Flowerpot Card here.

If you don't have a 4shared account, I have now added these files to my Dropbox account and you can download the files from there as well.  You can Download the Larger Flat Flowerpot Card here and/or Download the Smaller but Standing Flowerpot Card here.

As always, thanks for stopping by and I would love to see what you create with either of these files!

Tuesday, January 10, 2012

Diaper Card

My friend Margaret asked me to create a Diaper card for her last year. I did and then shared the cut file on my old blog. I recently saw a couple of requests where people were looking for a Diaper Card so I thought I'd share it again here.

I created the base card but wanted to use it to show my friends how easy it is to add a "texture" fill to it in MTC and to basically create your own card with different "textures" or "background images". For example, since this was a "Diaper Card" that you would use for a new baby - you might want to make one for a girl or for a boy - pink or blue - or if the sex is unknown - green, yellow, purple, etc. You could find a "baby print" that you like and "cut it out" of that paper, easy peasy. However, what if I only had the paper in pink and it was for a boy. Or, I couldn't find any baby paper that I liked in my stash. You could create your own "texture" or find one online and use it to fill your image and then cut it out. If I have paper I want to use but its the wrong color, I can scan it in, change the color with a graphics program, and add that as texture to my MTC file before cutting.

The pictures show the base card I originally created and cut out in white cardstock. Then the other pictures show where I scanned in paper I had and made texture files out of them. I then used those texture files to fill the image, print it on my printer, and then cut it out (spot on I might add!) with my MTC software and my Cougar cutter. Notice how the "print" on the diapers is different!


Since I scanned in my "texture" from paper I had, I cannot share those "textures" with you. However, you can create your own very easily. If you need help, in how to do that, check out Nelda's Tutorial she shared regarding "How to Convert Lettering Delights Paper to Seamless Texture for use in MTC". Click here to go to Nelda's Tutorial on her Blog. Scanning your own paper in would work similiarly. You can also create your own textures or backgrounds using a graphics program or google for free textures. Just remember that Andy (creator of MTC recommends texture sizes of around 256x256) so not to bog down your computer and memory.


As always - thanks for stopping by. Feel free to leave a comment if any questions. Would love to see what you do with any of my files. (If I keep asking - maybe you will come back and share! LOL)

Friday, January 6, 2012

New Features in Make the Cut and a New Lettering Delights Card Using them

Another more recent "repost" from my old blog!

I have actually been doing some crafting and playing with the new features that have recently been added to the Make the Cut software.

Here is a project card that I wanted to share with you. One of the newer features in the Make the Cut software (MTC) is the ability to access Lettering Delights cutting files (LD) directly from within your MTC software!  One of LD's more recent files set is called "All Season's Pop-up Cards".  Well, there is some "cute" stuff there but the pop-up cards themselves are a little plain and boring without any "color" to them (at least to me!).  Here's a picture of what the plain card looks like:


Cute little snowman with a friend and the snowflakes yes?  However, what if you could make the snowman and the bird really "pop" off the page - that would be better don't you think?  I did!  So this is what I made using several of the new features in MTC version 4.0.+!


Now, which card would you rather send out or receive in the mail?  I know I'd rather have the "color"!

So now, you probably want to know how I did that!  It's actually a lot easier then it's going to sound!  I'm not going to give a full tutorial or step by step, nor do I feel that I can share photos or screen shots of the process because the file is a purchased one from Lettering Delights.  However, if you are comfortable with MTC and some of its newer features you should be able to follow along with the "concept" as I do my best to "explain" what I did.  It would be helpful if you have some basic knowledge of MTC and its newest features in order to fully understand what I have done.

First, you would need to purchase and download one of the Lettering Delight's Popup files like this one or find another one from somewhere else (there are some out there for free as well!).  This snowman card came from LD's "All Season's Pop-up Cards" and is "Card 2" in that collection.

Once I had the base card downloaded onto my MTC mat, I created a new page in that same MTC file and copied and pasted in place the card base to the new page to work with that copy.  (Simply redownloading to that page would work also.)  I kept the first page to cut "as is" for my card base to which to adhere my "Print and Cut" file once it was completed. (Note: This card base is actually the "insert" that you would need to add to the inside of a card base you create.)  Now you are ready to "break the file" to create your "Print and Cut".

Select the card base, go to Edit-->--->Shape Magic---->Break

This will break the card into different "parts and pieces".  One of the first things I did was to select the snowflakes and snow "dots" all together, and "join" them back together as a group (edit ---> shape magic ----> join) so they are treated as "one" object, take them to their own layer, and then hide that layer so that they are out of the way.  (One reason I "join" them back together is so that when I want to work with them, move them around, etc.  I only have to click on one and it selects the entire group!)

I then took the other different "parts and pieces" of the snowman to their own layers and colored them.  I selected the snowman's eyes and mouth (again, did a "join" so they stay together as one "object") - took them to their own layer ('selection to new layer") and made their color "black" (I took them together because I was coloring both the eyes and mouth black.  If I wanted them different colors, I would have take the eyes to one layer and the mouth to its own layer).  I then selected the nose, took it to its own layer, and made it orange.  Finally, I "joined" the buttons to keep them together, took them to their own layer and colored them red.  Once I had all of these objects moved to their own layers and colored as desired, I hid those layers to keep them out of the way while I worked on the remaining parts I needed.

Next I did a little work on the bird. I will be bringing the entire (already) colored bird back in from the Lettering Delight's file a little later (No need to reinvent the wheel!) so I just need to get rid of the bird's eye and wing. There are two ways I could do that.  I selected the bird's wing and eye along with the body and "welded" (edit---->shape magic ----> weld) the bird's eye and wing to the base so that those "holes" are gone and it is one solid piece for cutting later.  I could also have deleted the wing and the eye from this part of the card but it would have and left the "holes" in the base and these would have still been cut out.  The way I did it with the welding, it is one solid piece now.

Now to complete the work, we need to do some "node editing." To do "node editing" you have to be using the newest version of MTC, version 4.0.+.  We need to use MTC's new node editing features to get the Snowman recognized as a "whole" snowman and to remove his stick arms from the body and make them into separate parts.  Right now he has "pieces" (cut lines) missing from his head and side where he is "attached" to the card base. We want to be able to cut the snowman out on his own and to color his stick arms brown.

Open the Node editing menu in MTC 4.0.+ (found on the left top corner of your MTC mat).  Click on the Bezier Curve tool, notice that you can now see the "nodes" blue dots at the end of lines (you may need to zoom in to see better). Left click on the top node on the left top side of the snowman's head, then go down to the bottom left side node and right click on the node there.  This will  add a line to the snowman and close off the left side of his head.  Repeat this on the right side of the Snowman's head.  This will make his head "whole" and ready to cut all the way around.

Now, before we do the same thing to the sides of his body, we need to cut off his stick arms and close the finger tips and end of the arms so that we can take them to their own layer and color them brown.  Using the knife slicing tool (probably a really good idea to zoom in closer here), go just above the top of the left stick arm where it joins the body, click, hold and drag it down to below where the bottom part of the stick joins the body and then release, this will cut the arm away from the body.  It is probably in two pieces, the top and bottom parts of the stick, select both pieces, move them a little way away from the body to help with the node work. (If you don't, you may end up rejoining them to the body accidentially!)  Again select the Bezier Curve tool and use it to close the "gap" or "missing line" on his middle finger tip and at the end of the stick (see instructions above on using this tool to close the sides of the head).  If done correctly, the "stick" will become whole and change color.  Now do the same to the stick arm on the right side.  Use the Knife/slicing tool to cut the stick off the body and then use the Bezier Curve tool to close the lines on the finger and at the end of the stick. You know have to "closed" stick arms!

Now use the Bezier Curve tool to close the "gaps" or add the "missing line" to the left and right sides of the snowman's body the same way you did the head and the stick arms.  Take the snowman's body to it's own layer and color it "white".  Move the stick arms back into place next to the snowman's body, take them to their own layer and color them brown. You will also then need to "copy" and then "paste in place" the snowman's arms onto the same layer with the snowman's body and then "weld" them to the body so that you have the correct shape to "cut" once you have him printed.  Welding should make them one piece with the body and make sure it is all still white.

At this point you can open and close layers as needed and use the node editing tools as desired to modify, correct lines as needed (making sure finger tip or head is more "curved" for example).

At this point, it's a good idea to make sure that all the different "layers" or "parts and pieces" are in the correct order for the best print and cut and make sure that they are not closed or hidden if needed for the print and cut..  (For example, the eyes, nose, mouth, and button layers should all be "above" the snowman's body layer so that they are "on top" and showing properly when printing.)

Once that is all done, you can then go back to the Lettering Delight's Files and download the "bird" from the "All Season's Pop-up Cards" collection.  Put it on its own layer, place it and size it correctly so that it is sitting on top of the snowman's head as needed.  You are now ready to do your printing. (If  you are just printing, the different parts and pieces of the bird do not have to be on their own layers since they are already colored differently and stay that way when you bring them in from LD's file.)

Couple of notes regarding printing.  First, you need to make sure that you only have the layers showing that you want included in the printing (in this instance, the bird and the snowman along with his eyes, nose, mouth, buttons and arms). Be sure you have closed any other layers not needed for printing.  Second, you need to decide if you just want the "fill" only or the "fill and outline" to show when you print and make any changes needed there.  On mine, both were showing so I have the lines around his nose, etc.  You can also use the "print preview" to see what is going to print.  Since the snowman himself is "white" with no outline showing, you won't see his body since "white" does not show on print preview.  (If you feel the need to verify that he's really there you can change his body to another color besides white before doing the preview - just remember to change it back to white if you want a white snowman!)

To print a file for a "Print and Cut" - first make sure that you have checked your printing options needed from within the MTC software.  Go to File ---->print options and select or deselect options as needed.  For example you will need to make sure that "print registration marks are checked" but the "use silhouette sd" is marked only if you are using that cutter.  Decide on printer outlines or not, etc.  Once done, click ok and print.

Once you have your printed page, follow the proper method needed to do a "print and cut" for your cutter of choice.  I have both a Silhouette SD and an 18" Cougar machine so how I do a print and cut with each of those machines varies.  (Note: If you have never done a 'print and cut" with your cutter before, you may need to first calibrate your machine before doing a "print and cut" to ensure your cutting is aligned properly with your image.)

One important step to remember at this point is to CLOSE any and all LAYERS that you DO NOT WANT TO CUT!  For example, we only want to cut the "outline" of the snowman with the bird on his head so that is the only layer we would have showing.  We would close the colored bird, along with the snowman's eyes, nose, mouth, buttons, and arms along with the card base. (If we forget to close those layers, they will "cut" and you will not have an orange nose, red buttons, etc!)

Once you have your "print and cut" printed and cut out, you are ready to adhere it to your inside "pop-up base".  Cut out the original "card base" from the Lettering Delights file.  Adhere your "print and cut" to the Snowman and then apply the entire base to a base card being careful not to adhere the parts of the snowman that "pop-up".  (Note:  I always remove or hide the layer with the scored/fold lines because I don't like the little "slits" it puts in the card.  This is a personal preference.)

Now you have a cute "colored" pop-up to send out to your family and friends!

Couple of other quick notes, if you want to vary the card size, you need to put the card base on the same page on its own layer - have ALL layers showing, "select all" and resize so that you resize all together and in proportion!You can also now use this file to "paper piece" the snowman if desired as well.  You would just cut out the different parts and pieces as needed.  This would be great or adding a little "dimension" to a project.  You could also use the "print and cut" as a stand alone object (like on the front of the card) and can resize him as needed, etc.  Use your imagination and have fun!

Thanks for stopping by!  I hope my basic "instructions" are helpful to you in making other simple files have a little more "pop".  Please feel free to leave a message should you have any questions or comments.  I tried to make sure I covered all the steps but I may have missed something or not explained it well enough!